In order to make them easier to visualize, DITA-FMx performs minor adjustments to hazardstatement elements when authoring.
The DITA model places the hazardsymbol element at the end of the hazardstatement model. This can make for a somewhat odd-looking layout when authoring. The default DITA-FMx publishing process wraps this model in a special hazard table to make it all look right, but that can’t be easily done for authoring.
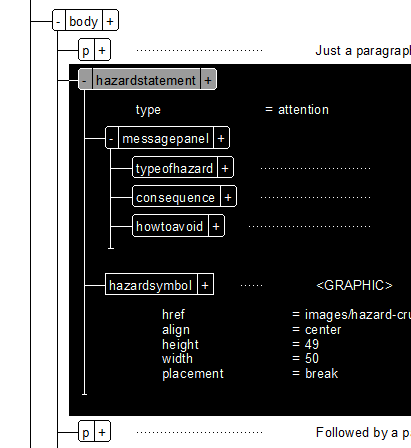
As of DITA-FMx 2.0.06, special processing of hazardstatement elements while authoring, is done if the Process Hazardstatement Elements option is enabled in the Authoring Options dialog.
The default DITA-FMx Topic application, indents the hazardstatement elements which allows the hazardsymbol image to be moved into the space to the left of the hazard information. The Max Symbol Width setting in the Authoring Options dialog controls the maximum image width; be sure to set this to a value that fits in the available space.
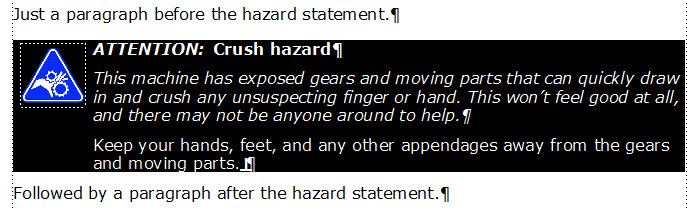
The hazard type label (“ATTENTION:” in the image above) is controlled by the autonum prefix of the paragraph tag assigned to the typeofhazard element. This paragraph tag is set based on the type attribute of the hazardstatement element. The position of the hazardsymbol image is set when the image is inserted. It’s also updated on file save, so it may not look quite right after adding more content to the hazard statement until you save. If multiple hazardsymbol elements are included, only the first is placed in the indented space; the rest are added after the last messagepanel element.
Setting the align attribute of the hazardsymbol element controls the horizontal placement within the indented area as well as in the published output.