Perform a manual installation of the structure apps or gain an understanding of what needs to be done.
The following steps describe the installation of the structure applications provided with DITA-FMx.
Make a backup copy of your current structure application definitions file (typically found at FrameMaker\Structure\structapps.fm for FM7.2 and FM8, or <user appdata>\Adobe\FrameMaker\9 for FM9). Store this file in a safe location before making modifications.
Extract the contents of the DITA-FMx_apps.zip file to the FrameMaker\Structure\xml folder. This will create a folder named DITA-FMx_1.1 that contains folders named Book, dtd, Map, and Topic. These folders contains the three structure application as well as the DITA 1.1 DTD files used by the applications.
Note: The EDD files provided with DITA-FMx are in MIF format by default. This results in the installer application being 8 MB smaller in file size than it would be if we provided the EDDs as FM binary files. If you plan to modify the EDDs in any way, you should save them as FM binary files before making any modifications. After saving as an FM binary, feel free to delete the MIF files.Start FrameMaker and open the structure application definitions file (). (If running FM9, this opens the structapps.fm file in your “USERNAME\AppData” area, not the one in the FrameMaker program files area).
Open the Structure View window (for FM7.2 or FM8 click the
 button on the upper right of the document window, in FM9
or FM10 choose ).
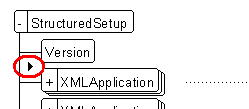
In the structure application definitions file place the insertion
point just after the Version element. When the insertion point is
in the right location, you’ll see a black triangle pointing to the
right in the Structure View window (see the following image).
button on the upper right of the document window, in FM9
or FM10 choose ).
In the structure application definitions file place the insertion
point just after the Version element. When the insertion point is
in the right location, you’ll see a black triangle pointing to the
right in the Structure View window (see the following image). Choose , then navigate to the structapps-stub_topic_1.1.fm file in the DITA-FMx_1.1\Topic folder created in step 2. Select the Import by Reference option and choose the Import button. In the next dialog accept the defaults and choose Import.
Note: If you see red dotted lines in the Structure View window after importing the “stub” file, it has been inserted into the wrong location. Delete the inset and try again. Make sure that the black triangle is placed as shown in Structure View window insertion point.Repeat step 4 for the “structapps-stub” files in the DITA-FMx_1.1\Map and DITA-FMx_1.1\Book folders.
Save the file, then choose .
Close the file and exit FrameMaker.
Restart FrameMaker and run the command and select DITA-FMx-Topic-1.1 for the DITA Topic Application, DITA-FMx-Map-1.1 for the DITA Map Application, and DITA-FMx-Book-1.1 for the DITA Book Application.
If you plan to make use of the DITA Open Toolkit for generating output, see Setting Up to Use the Generate Output Command.