Install the AutoFM plugin and the AutoFM structure application.
AutoFM relies on a structure application for parsing and analysis of the AutoFM script. After installing the plugin, be sure to install the structure application.
Run the AutoFM installer application.
This copies the autofm_<fmver>.dll, autofm-pdf.dll, autofm.chm,and autofm_app.zip files to the FrameMaker\Pubs-Tools folder. It also updates the maker.ini file to register the plugin DLLs.
Install the AutoFM structure application.
If you’re using AutoFM with FMx-Auto, and DITA-FMx is installed, you’ll be prompted to auto-install the structure application after restarting FrameMaker. If you choose not to auto-install or are using this separate from FMx-Auto, you’ll need to manually install the structure application as follows.
Note: The AutoFM structure applications are provided in FM8 format. If you’re installing on FM7.x, you’ll need to save to the FM7 format before use. If you are unable to do this, contact Leximation.Extract the autofm_app.zip archive to the FrameMaker\Structure\XML folder so it creates an AutoFM folder at that location.
Open your structure application definitions file ().
In the Structure View window place your insertion point just before an existing XMLApplication node, then choose .
In the Import dialog, navigate to the Structure\XML\AutoFM folder and select the autofm_structapps-stub.fm file.
Accept the defaults in the Import Text Flow dialog, and choose the Import button.
Save the file and choose , then close the structure application definition file.
Review your Adobe PDF Printer Preferences.
If you plan to use the option to “print” to a PDF file, you must make sure the Adobe PDF printer preferences are set properly. The Adobe PDF Output Folder option must be set to “Prompt for Adobe PDF Filename”. If you are running AutoFM on a server or in an automation workflow, you probably don’t want the generated PDF to display on screen. To prevent the PDF from displaying, deselect the “View Adobe PDF Results” option.
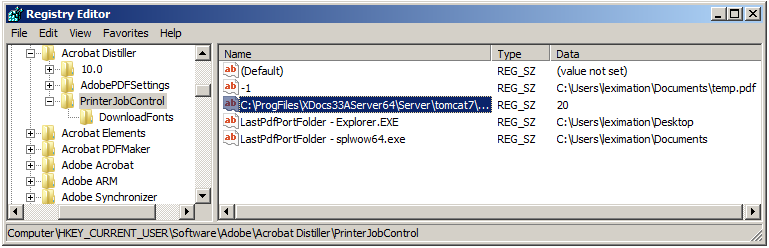
Each time you “print” a PDF, an entry is added to the PrinterJobControl key (folder) in the registry (shown in the following screen shot). This may be useful for certain situations, but it can also quickly add to the “cruft” in the registry if you’re generating a lot of PDFs through AutoFM. If you’d like these entries deleted as they are created by AutoFM’s automated processing, set the General/DeletePdfRegEntry parameter to 1 in the autofm.ini file. The autofm.ini file is located in the FrameMaker\Pubs-Tools folder for Windows XP systems and in the %appdata%\Adobe\FrameMaker\<version>\Pubs-Tools folder on Windows Vista, 7, and 8 systems.
 Important: If you are running a 64-bit version of Windows, the PDF generation process relies on the splwow64.exe application. By default this is found at C:\Windows\splwow64.exe, but if it is in another location on your system, enter the full path and filename in the General/SPLWOW64 parameter in the autofm.ini file.
Disable automated update checking.
Choose , then enter “0” in the Check For Updates Frequency field and choose Close. This prevents the Leximation plugins from running the Check for Updates process which may interrupt automated processing. If you have other plugins installed that perform automated update checking that could interrupt the AutoFM processing, disable those actions as well.
It is best to restart FrameMaker after completing the installation of the structure application. You are now ready to create an AutoFM file.
Uninstalling AutoFM
There is no Uninstall application provided for AutoFM. Because only a few files are installed, it’s easiest to just perform this uninstallation manually.
To disable the AutoFM plugin without removing any files:
Comment out the “Pubs-Tools:AutoFM” and “Pubs-Tools:AutoFM-PDF” entries in the APIClients section of your maker.ini file in the main FrameMaker folder (just add a semicolon at the start of each line).
When you restart FrameMaker, this plugin will no longer be active.
To remove AutoFM from your FrameMaker installation:
Locate the “Pubs-Tools:AutoFM” and “Pubs-Tools:AutoFM-PDF” entries in the APIClients section of your maker.ini file in the main FrameMaker folder.
Delete these lines from the INI file, then save and close that file.
Delete the autofm*.* files from the Pubs-Tools folder located in the main FrameMaker folder (and possibly from your “AppData” folder if using Windows Vista, 7, or 8).
Delete the AutoFM folder from the FrameMaker\Structure\xml folder.
Remove the AutoFM entries from your structure application definitions file.