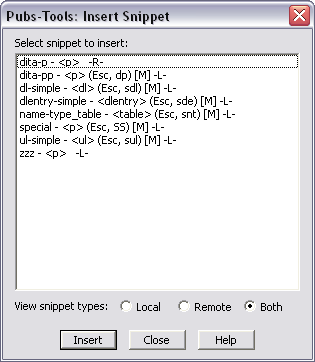
Add a predefined snippet to your document.
The Insert Snippet dialog lists all of the snippets defined in your Local and Remote snippet folders. Each snippet is listed by name and the root element type. If a snippet can be inserted using shortcut keys, that key sequence is shown in parenthesis and snippets that are available from the context menu are indicated with the “[M]” symbol. Local snippets are indicated with a “-L-” and remote snippets are indicated with a “-R-”.
The Insert Snippet dialog lets you display the snippets in three different views. By selecting one of the View Snippet Types options, the list will display the Local snippets, the Remote snippets, or both (sorted alphabetically together). If the Remote and Both options are disabled, then you haven’t defined a Remote snippet folder.
To insert a snippet, run the Insert Snippet command, place your insertion point at the location to insert the snippet, then double-click the snippet name in the dialog (or select the name and choose Insert). If the root element of the snippet is not valid at the current insertion point, a message will display. The Insert Snippet dialog is modeless, so you can leave it up while working, allowing you to insert multiple snippets as needed.
Each snippet can be assigned an “Esc” shortcut key sequence, and can be added to the context menu. If either or both of these options are defined for a snippet, you can use that method for inserting the snippet. You can always change the snippet name or these special access methods by using the Manage Snippets command. When you run the Manage Snippets command, the Insert Snippet dialog closes.
If a snippet contains the unique “snippet wrap string” characters, and you have selected a range of text or elements, the selected content will be deleted, then inserted at the location of the snippet wrap string. This allows you to define snippets that wrap the selected content with the pre-defined snippet. For additional information, see the discussion of wrapping snippets in Save Snippet.
