Information and tips regarding the image handling features.
To insert an image, just insert the image or fig element from the Element Catalog. The Insert Image dialog lets you select the image folder location and the image file name. You can also set the alignment, placement, and DPI values. If the “fmdpi” feature is enabled, the DPI value will be assigned to that property, otherwise it’ll be used to set the height and width attribute values.
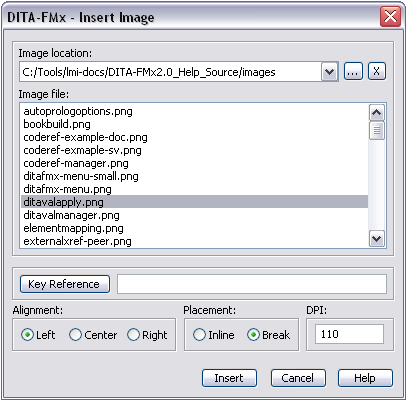
Use the “...” (browse) button to add one or more image location paths to the list. The “X” button deletes the current path from the list.
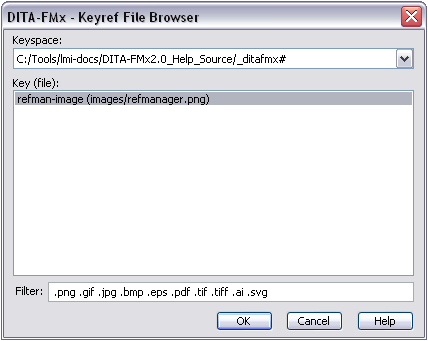
Alternatively (or in addition to selecting the file name), you can specify a key reference to identify the image file. Choose the Key Reference button to display the Keyref File Browser dialog. Selecting the keyspace lists all of the keys in that keyspace that reference files which match the specified file name filter.
When an image is added to a document, the anchored frame is “shrink-wrapped” to the size of the image. The relative path to the image file is added to the href attribute and the height/width in pixels is added to the height and width attributes. The initial value of the placement attribute matches that specified as the default in the EDD, unless the image is auto-inserted as the result of inserting a fig element in which case the placement attribute is set to “break.” For images where the placement attribute value is “break,” the initial alignment is set to match that of the default value of the align attribute as defined in the EDD; no alignment value is set for “inline” images.
You can change the alignment after inserting the image by editing the value of the align attribute or by selecting an alignment option in the Anchored Frame dialog (). The height and width cannot be set through the attribute value; they can only be changed by re-importing the image using a different scaling, or by changing the properties through the Object Properties dialog. The href attribute also cannot be changed through the attribute value.
If you do not want any height/width values associated with an image, deleting those attributes in the XML or Frame document will result in the image element being written with no values for height and width which uses the “native” (default) size of the image. This is often desirable for output being generated as HTML.
If you want to use the native size of raster images for output generated through the Open Toolkit but want to use a specific DPI for output generated from FrameMaker, add an “fmdpi:DPI” attribute value to the image/@outputclass attribute, where DPI is the DPI value. Adding this value to the outputclass attribute allows the DPI setting to round trip from XML to Frame and it will only be used by FrameMaker; other output processes will see no height and width values and will use the native image size. Adding this value to the outputclass attribute deletes any value set to the height or width attributes.
If you want to use the fmdpi feature for all raster images, enable the “Use fmdpi for New Images” setting in the Authoring Options dialog. This will set the fmdpi value to the DPI value you select when importing the image. The fmdpi value is only set for raster images; this feature is not available for vector images.
Baseline Offset of Inline Images
By default, the baseline offset for inline images is set to 2 pts (this shifts the image 2 pts below the baseline of the surrounding text). If you want to set this property to a different value, change the value of the Baseline Offset option in the Authoring Options dialog. This value is only applied to inline images. Setting the “baseline offset” property in the read/write rules file has no effect.
Special Handling of Alternative Text (image/alt)
Content of an image/alt element is stored in the anchored frame’s “object attribute” while open in FrameMaker. To edit the alt text, select the anchored frame, then choose , then Object Attributes. The alt value is stored in the “Alternate” field.
Because a graphic object cannot have child elements this content is stored in an attribute, any attributes on the alt element or child elements are discarded when the file is opened in FrameMaker.